once I left my Thica.net abandoned two days long, without even knowing that with my smart
hacks, all the internal links were totally broken. The worst thing is, that mechanic Google didn’t forgive me about this, which resulted in a disappearance of Thica.net from the first 2 result pages – ugh.
So after that stupid “accident”, I decided to keep myself out of those risks. I installed a local development version of Thica.net on my own PC. It was a true breeze – very easy and fast. If you’re like me – always living on the news trying new cool stuffs – then here is a step-by-step guide, with no or very little coding involved. Even better, all software to be used are free/open source.
Step 1: Downloading XAMPP
I always prefer quick and easy ways. So to setup a server that hosts my development copy, instead of seperatedly download and install and configure those complex Apache, MySQL, PHP, I obtained a copy of XAMPP which is a package with all Apache, MySQL, and PHP bundled (in case you’re wondering, X stands for “all major operating systems”, A for Apache, M for MySQL, 1st P for PHP, 2nd one for Perl).Step 2: Installing XAMPP
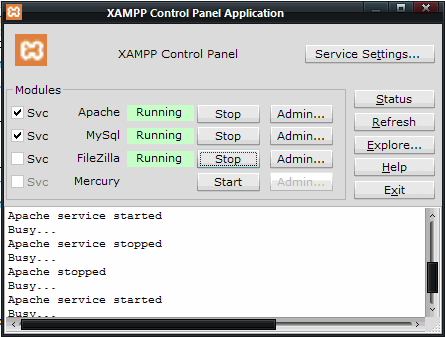
The installation was dead simple. Just run the downloaded executable file, click Next, Next, Next, then done. By default, the XAMPP files are saved at C:\xampp, but I chose to place them under E:\xampp\xampp, just by habit.Just before the installation is finished, XAMPP will start Apache, PHP, and MySQL as services. If for any reason it doesn’t, you will head to its installation folder, start XAMPP control panel by double clicking xampp-control.exe, and manually manage those services there.
Now the server is basically ready to rock. Piece of cake, isn’t it? Now on to the next steps.
Step 3: Copying the files
Now, for the content, first I created a directory called “thica.net” in my XAMPP’s htdocs folder. To fill it up, I fired up my all-time favorite FTP client FileZilla and started downloading everything from my server.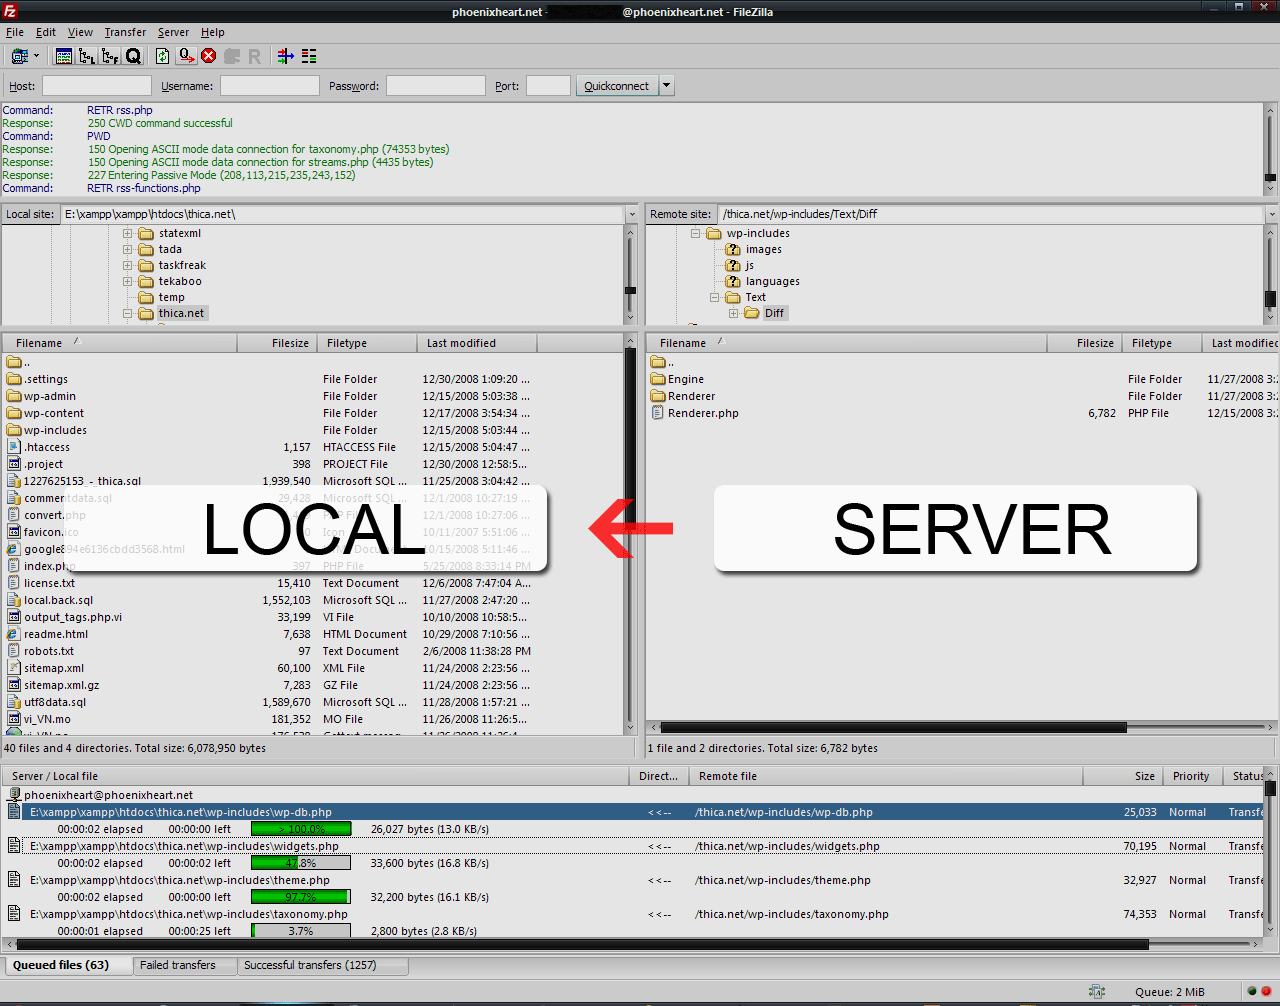
Of course you may use some plugins out there or the useful backup feature of cPanel to get the server content into one archive and extract it on local. Whatever it is, just make sure the contents of you remote site and local folder are identical.
Step 4: Creating the local database
Now we’ll have to run the SQL dump file just downloaded toward the local MySQL to create the local database. Any MySQL front end utility can do this, but I used the most popular phpMyAdmin which should be built-in already at http://localhost/phpmyadmin/ right after XAMPP was installed (remember it?). Well, just click “Databases” and locate “Create databases” section.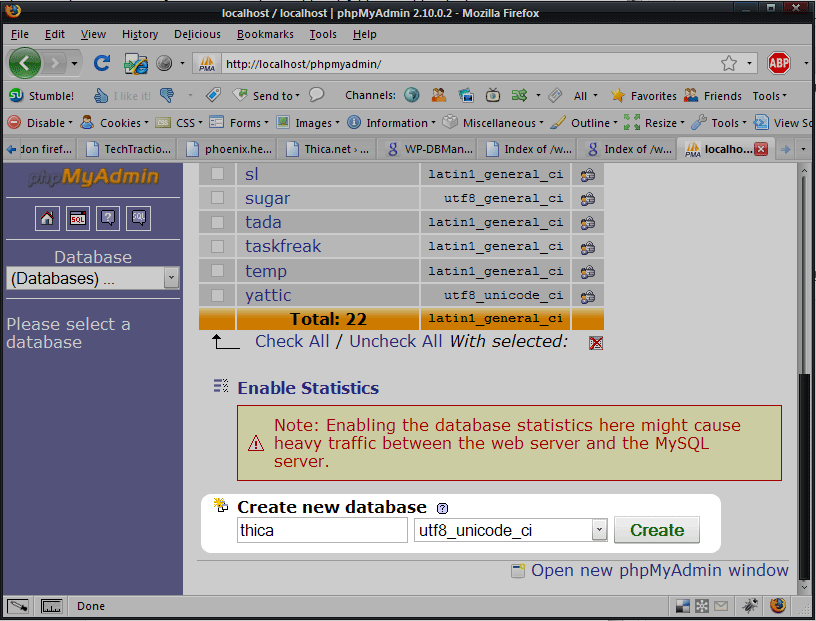
Note that I set the database collation as “utf8_unicode_ci” which is the best in most cases.
Step 5: Backing up the remote database
I used a extremely useful plugin called WP-DBManager to backup the whole server WordPress database into one SQL dump. After installing and activate the plugin, just head to Database -> Backup DB and you’ll be served with something similar to this screenshot: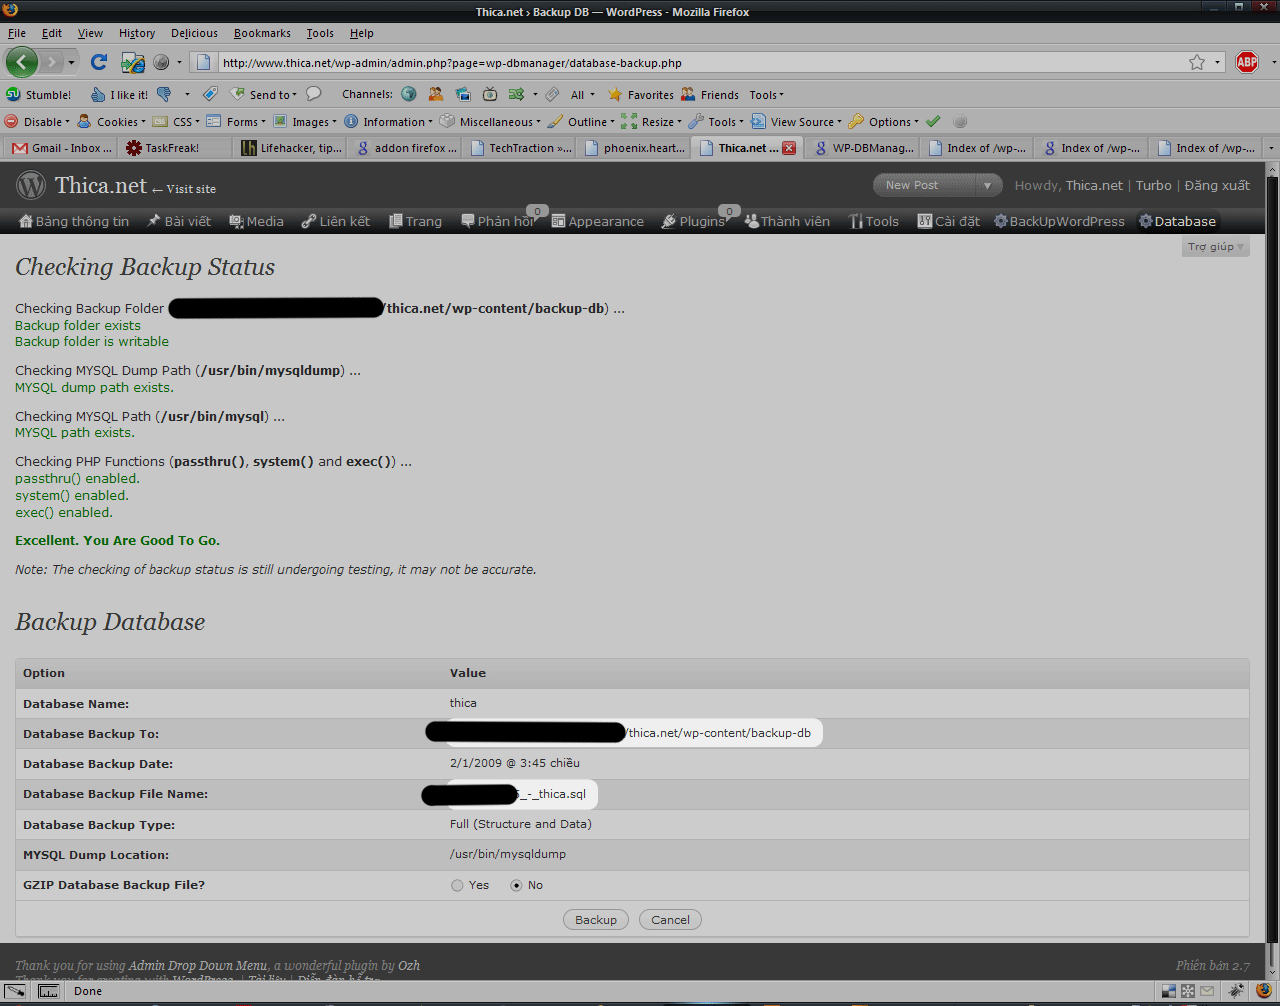
One the database was backup, I downloaded the dump file to my local machine and process to the next step.
Step 6: Populating the local data
Now, with the SQL dump in my hand, we’d need to populate it so that the data is the same as that of the remote server. For this, I accessed http://localhost/phpmyadmin/ again, selected the database “thica” created in step 4 and clicked “Import”. In the new screen, I browsed to the SQL dump file (of course you will need to extract it if it’s gzipped), and clicked “Go” button. In a matter of seconds (actually it depends on your database size) phpMyAdmin will transfer the data and I’ll have an exact copy on my local machine.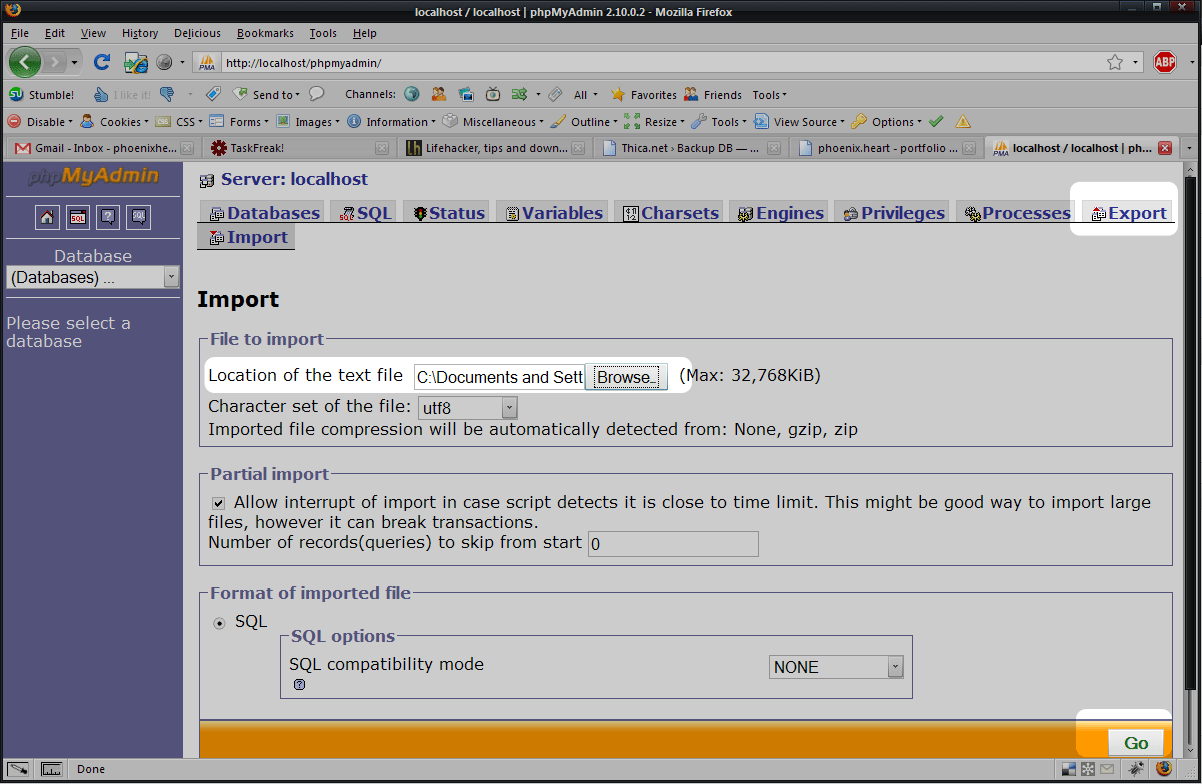
Step 7: Some configurations
Now for the development version to be able to connect to and query the local MySQL database, we’ll have to configurate a bit. Open the file wp-config.php in your local wordpress folder (we’re talking about my site, then it’s E:\xampp\xampp\htdocs\thica.net) with any plain text editor and locate some lines similar to these:define('DB_USER', 'remote-mysql-username'); // Your MySQL username
define('DB_PASSWORD', 'remote-mysql-password'); // ...and password
define('DB_HOST', 'localhost'); // ...and the server MySQL is running ondefine('DB_USER', 'root'); // Your MySQL username
define('DB_PASSWORD', ''); // ...and password
define('DB_HOST', 'localhost'); // ...and the server MySQL is running onStep 8: Creating a virtual host
Next I decided to create a virtual host instead of using the dumb and inconvenient http://localhost/thica.net url. It’s never been that easy with XAMPPFirst I opened the file httpd-vhosts.conf in E:\xampp\xampp\apache\conf\extra folder with Notepad++ and added these lines at the very bottom:
NameVirtualHost thica.dev:80
<VirtualHost thica.dev:80>
ServerName www.thica.dev
ServerAlias thica.dev
DocumentRoot "E:\xampp\xampp\htdocs\thica.net"
</VirtualHost>Next I opened the “host” file (no extension!) in C:\WINDOWS\system32\drivers\etc and added this line:
127.0.0.1 thica.dev www.thica.devStep 9: Final touches
With the files already in place and the database ready to server, I accessed www.thica.dev in my browser. But how strange… instead of the local development site, I was redirected to http://www.thica.net. It turned out that WordPress had some settings that takes effect in this here: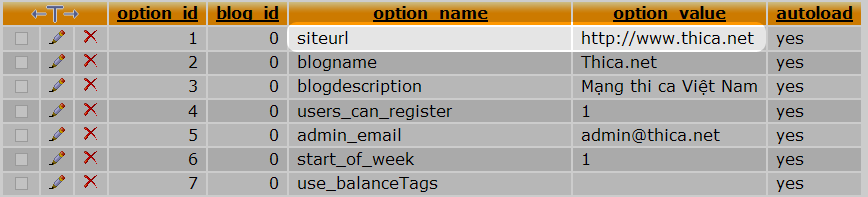
and here

So, using phpMyAdmin, I changed both values into http://www.thica.dev. Now pointing my browser to www.thica.dev works!
But wait… I’m a perfectionist, and I want more. There is a FireFox addon called Server Switcher which helps us switch between the Live and Development versions with just one click. Yes, it may sound small, but it certainly comes in handy. So if you want it perfect, install this little plugin.
